
VIVOTEK VSS Setup and User Guide
Getting Started: VIVOTEK VSS Onboarding Guide
1. For End-Users
VIVOTEK VSS Setup and User Guide, If you are an end-user, it is highly recommended to contact your system integrator for assistance. Before reaching out, ensure you have reviewed the following items and are ready to provide the correct information to your system integrator:
(a) To Enable VORTEX Connect Service on VSS:
Perform these steps on the VSS server.
- Check Version: Ensure VSS is version v1.5.2xxx or later (supports Lite, Std, and Pro editions).
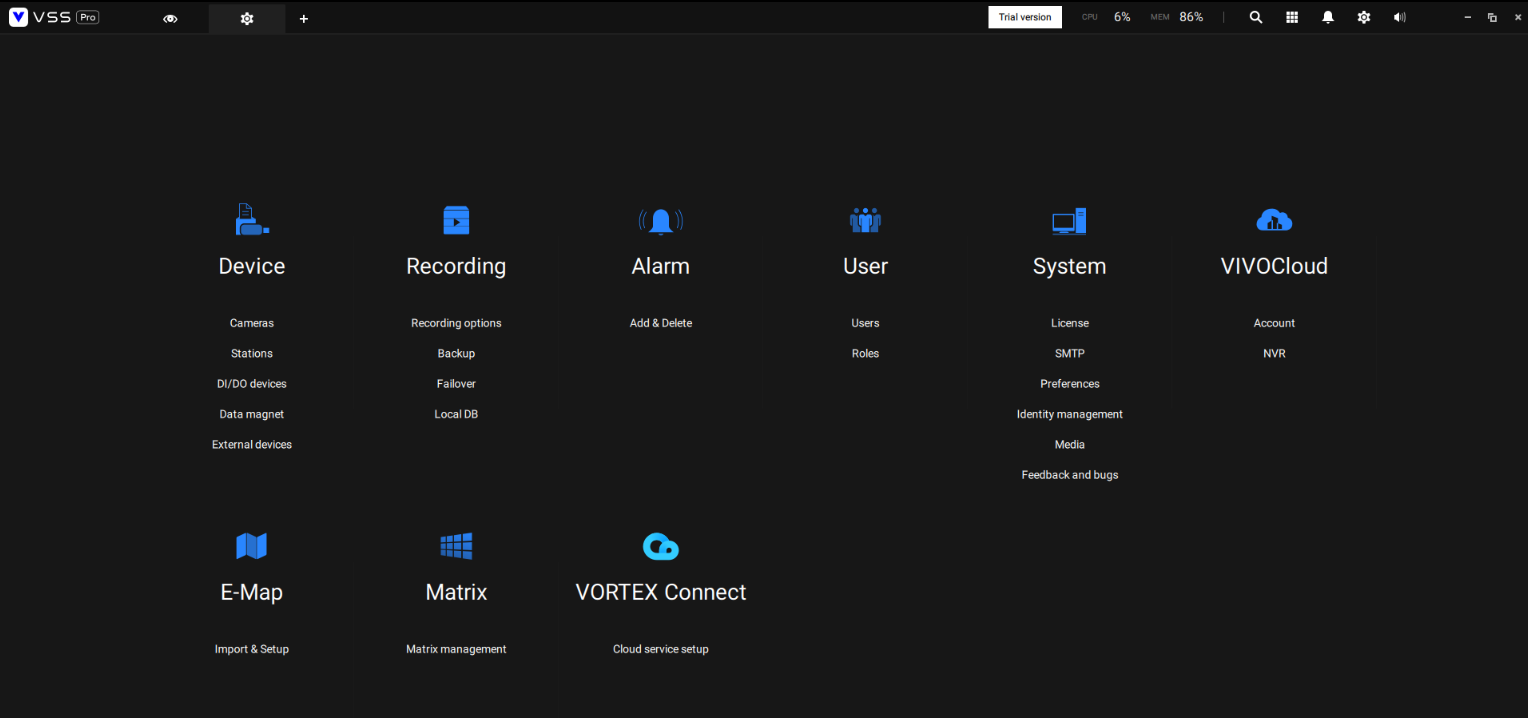
- Enable Connection: Open the VSS software "Setting" and enable "VORTEX Connect".
- Get Device ID: In the VORTEX Connect tab, copy the 12-digit "Device ID" displayed.
- Add Device (VORTEX end-user Portal):
- Log in VORTEX end-user portal
- Navigate to the "Devices" tab and click "Add Device".
- Select manual entry and paste the Device ID from Step 3.
- Completion: The system will pair automatically. No VPN or port forwarding configuration is required.
(b) To Add the VSS to an existing VORTEX organization:
- Log in to the existing VORTEX organization.
- (If your VORTEX organization is not yet bound with a system integrator) Add the system integrator's email via "Reseller Management" tab
- Note: For guidance, refer to section "Reseller Management" in portal guide https://www.vortexcloud.com/public/resource/blog/portal-guide
- Contact your system integrator and provide the following information to add the VSS to your existing organization.
- VSS Device ID
2. For System Integrators (SI)
If you are a system integrator (SI), please follow these steps:
- Review Customer Requirements:
- Refer to the "For End-Users" section above to understand the customer's specific requirements.
- You must aquire a VORTEX Reseller Portal Account
- Apply for a Dual-Purpose Account (Used for both VORTEX Reseller Portal and VIVOTEK VPP Portal):
- VIVOTEK USA Customers: Apply Here
- Global Customers: Apply Here
- Note: Approval may take a few business days. Please contact your VIVOTEK sales representative to expedite the process.
- Urgent Workaround:
- If installation cannot wait, follow this guide to create a VORTEX End-user portal directly. You can link your Reseller portal account later via "System" -> "Reseller management".
- Apply for a Dual-Purpose Account (Used for both VORTEX Reseller Portal and VIVOTEK VPP Portal):
- Ensure End-User's VSS is connected to VORTEX Cloud
- Perform these steps on the VSS server.
- Check Version: Ensure VSS is version v1.5.2xxx or later (supports Lite, Std, and Pro editions).
- Enable Connection: Open the VSS software "Setting" and enable "VORTEX Connect".
- Get Device ID: In the VORTEX Connect tab, copy the 12-digit "Device ID" displayed.
- Perform these steps on the VSS server.
- Follow VORTEX Handbook 1 Instructions to assist the customer in either:
- Adding the VSS to an existing organization using the "access" class="text-sky-600 dark:text-sky-400 font-medium hover:underline" title="Guides for remote access">Remote Access" feature in the reseller portal.
- Or, creating a new organization for the customer and adding the VSS to it
- Add Device (In VORTEX end-user Portal):
- Go back to the VORTEX Portal (accessed via Remote Access in reseller portal).
- Navigate to the "Devices" tab and click "Add Device".
- Select manual entry and paste the Device ID from Step 3.
- Completion: The system will pair automatically. No VPN or port forwarding configuration is required.
- Add Device (In VORTEX end-user Portal):
Key Notes:
- Ensure the customer's provided email address is valid and not associated with any existing VORTEX organization.
- Note: VORTEX Handbook 1 is under the "Resources" tab for detailed steps by logging in to the Reseller Portal https://reseller.vortexcloud.com/
VIVOTEK VSS Setup and User Guide
[Vortex] Getting Started: VSS VORTEX Connect Setup Guide
VORTEX Connect links your on-premise VSS with the VORTEX cloud for remote monitoring via the VORTEX Portal and Mobile App.
A registered VORTEX account is required to use this service.”
Setup Overview
Setting up VORTEX Connect involves three parts:
- Enable VORTEX Connect service on VSS
- Register and log in to your VORTEX account via the VORTEX Portal or Mobile App
- Add VSS to the VORTEX cloud
Follow the steps in each part to complete the setup.
Part 1. Enable VORTEX Connect service on VSS
1. Go to the Settings > VORTEX Connect, and enable VORTEX Connect in your VSS.
2. Confirm that the Cloud connection status shows Connected. A unique Device ID will be generated when your VSS is successfully linked to the VORTEX platform.
3. If the Cloud connection status shows Disconnected, check your network connection. An active internet connection is required to use this feature.
Part 2. Register and log in to the VORTEX account
Since this service is provided by the VORTEX Cloud platform, you must log in with your VORTEX account via the VORTEX Portal or Mobile App.
- If you don’t have a VORTEX account, follow the instructions in:
- [VORTEX] Getting Started: Setting up your VORTEX account – VIVOTEK Support Center
- If your account is not yet part of a VORTEX Organization, the Portal will guide you to create one or join an existing Organization.
- If your System Integrator (SI) supports the VORTEX platform, you may contact them to help you join their Organization or create one for you.
Part 3. Add VSS to the VORTEX cloud
You can add your VSS to a VORTEX Organization using either method:
- From the VORTEX Portal:
- Go to the Devices page, select Add Device, and enter the Device ID shown in your VSS VORTEX Connect screen.
- From the VORTEX Mobile App:
- Select Add Device, then use the QR code scanner to scan the QR code displayed in your VSS VORTEX Connect screen.
Verify your connection
After adding your VSS to a VORTEX Organization:
- In the VORTEX Portal or App, check that your VSS appears in the Devices Tab.
- In your VSS VORTEX Connect screen, confirm that the Organization binding status shows Bound.
What happens after setup?
Once setup is complete, you can:
- Monitor camera live video from your VSS remotely using the VORTEX Portal or Mobile App.
- Access and playback recorded footage anytime, anywhere.
Getting Started: VIVOTEK NVR Onboarding Guide
1. For End-Users
If you are an end-user, please contact your system integrator for assistance. Before reaching out, ensure you have reviewed the following items and are ready to provide the correct information to your system integrator:
(a) To Add the NVR to an existing VORTEX organization:
- Log in to the existing VORTEX organization.
- Add the system integrator's email via "Reseller Management" tab
- Note: For guidance, refer to section "Reseller Management" in portal guide https://www.vortexcloud.com/public/resource/blog/portal-guide
- Contact your system integrator and provide the following information:
- NVR MAC address
- Existing VORTEX organization owner e-mail
- Note: Check it via "System" tab -> "Organization details" -> "Advanced" -> "Organization Owner"
- Ask the system integrator to add the NVR to your existing organization
(b) To Add the NVR to a new VORTEX organization:
- Contact your system integrator and provide the following information:
- NVR MAC address
- A new email address to be used as the owner for your new VORTEX organization.
- Note: This email cannot already be associated with any existing VORTEX organization, as one email can only be used for one organization.
- Ask the system integrator to add the NVR to the new organization
2. For System Integrators (SI)
If you are a system integrator (SI), please follow these steps:
- Review Customer Requirements:
- Refer to the "For End-Users" section above to understand the customer's specific requirements.
- Follow VORTEX Handbook 1 Instructions to assist the customer in either:
- Adding the NVR to an existing organization using the "Remote Access" feature in the reseller portal.
- Or, creating a new organization for the customer and adding the NVR to it
Key Notes:
- Ensure the customer's provided email address is valid and not associated with any existing VORTEX organization.
- Note: VORTEX Handbook 1 is under the "Resources" tab for detailed steps by logging in to the Reseller Portal https://reseller.vortexcloud.com/
Reseller Portal Account Application
If you do not yet have a VORTEX Reseller Portal account, we recommend contacting your VIVOTEK representative as soon as possible to apply. Having access to the Reseller Portal will enable you to fully utilize VORTEX's features designed to support system integrators in assisting customers.
Urgent Assistance Without a Reseller Portal Account
If you urgently need to assist a customer with NVR setup but do not yet have a Reseller Portal account, please follow the appropriate steps in this guidance: Getting Started: Help end-user setting up the organization without using reseller portal account
Getting Started: When and how you will require to manually upgrade your VORTEX camera firmware?
Question
When and how you will require to manually upgrade your VORTEX camera firmware?
Answer
The following scenarios will require a manual firmware upgrade:
1. Older devices
If the device you purchased is too old to support automatic firmware upgrades, you will need to upgrade your firmware manually to fully enjoy all the features of VORTEX.
Note: Firmware versions prior to the specified versions do not support automatic firmware upgrades.
| Camera Model | FW supported version |
| FD819/FD839/IB839/IT839 | 3.33.4 |
| FD837/IB837 | 3.371.4 |
| FE912/FE931 | 3.37.4 |
| FD639/IB639 | 3.41.3 |
2. Checking for Newer Firmware Versions:
If your firmware version is supported and you have scheduled firmware upgrades but still want to check for a newer version at the moment for a specific device, you can manually check and upgrade.
Steps to Manually Upgrade Firmware
Using VORTEX Portal:
1. Navigate to the device page in the VORTEX portal.
2. Go to System > Firmware update to access the firmware upgrade interface.
The system will check if a newer firmware version is available.
3. If a newer version is available, click "Update now" to upgrade the firmware for the device.
Using the VORTEX App:
1. Open the VORTEX app and go to the camera settings.
2. Navigate to the Firmware Version section to check for available updates.
3. Click on the "Update" button if there is any available upgrade.

Did this security guide help you?
Rate this article to help fellow engineers find the best guides.

Alex Vance
Senior Security Systems Architect & IoT Consultant with over 15 years in digital surveillance design.

Discussion (0)
No comments yet. Be the first to share your thoughts!
Leave a Comment