Annke Vision - Adding Online IP Cameras on Annke DVR
03 May 2026
0 views
Applies to: DT41Y/DT61Y/DT81Y/DN41R/DN61R/DN81R/DT41GB/DT81GB/DT61GB/DT41DB/DT81DB/DT61EQ/DW61LD/DT81DP/S500/S300/FC200
Purpose:
Before you can get a live view or record of the video, you should add the network cameras to the connection list of the device.
Before you start: Ensure the network connection is valid and correct.
You can manually add an IP camera by the following steps.
Steps:
- Select the Add IP Camera option from the right-click menu in live view mode
Or click Menu> Camera> Camera to enter the IP camera management interface.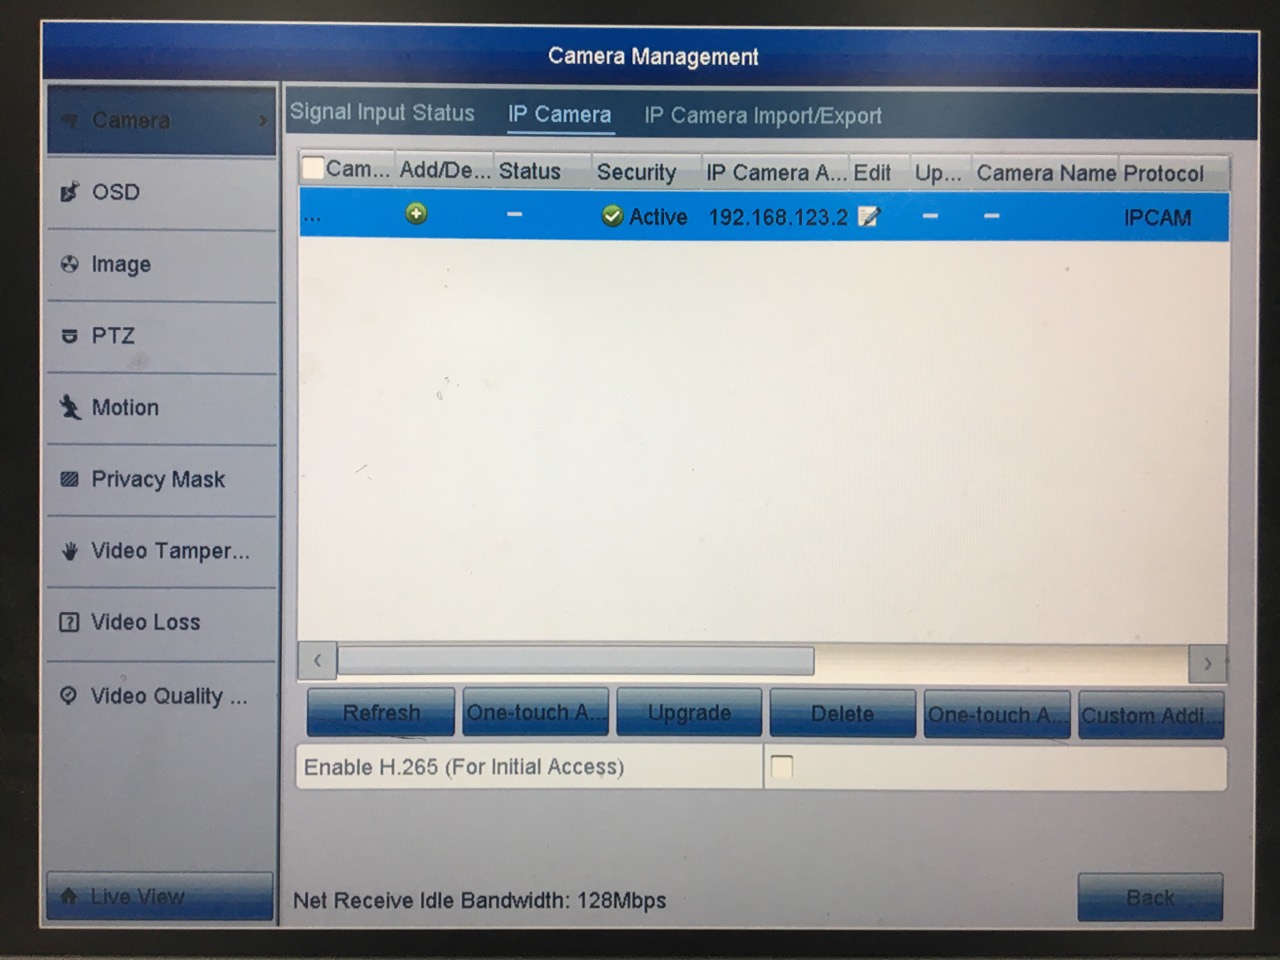
- The online cameras with the same network segment will be detected and displayed on the camera list.
-
Select the IP camera from the list and click the button to add the camera
Or click the One-touch Adding button to add all cameras from the list.
Note: Make sure the camera to add has already been activated by setting the admin password, and the admin password of the camera is the same with the DVR’s. If the cameras don't activate, please go to Activating IP Cameras on Annke DVR.
You can also custom add an IP camera by the following steps.
Steps:
- On the IP Camera Management interface, click the Custom Adding button to pop up the Add IP Camera (Custom) interface.
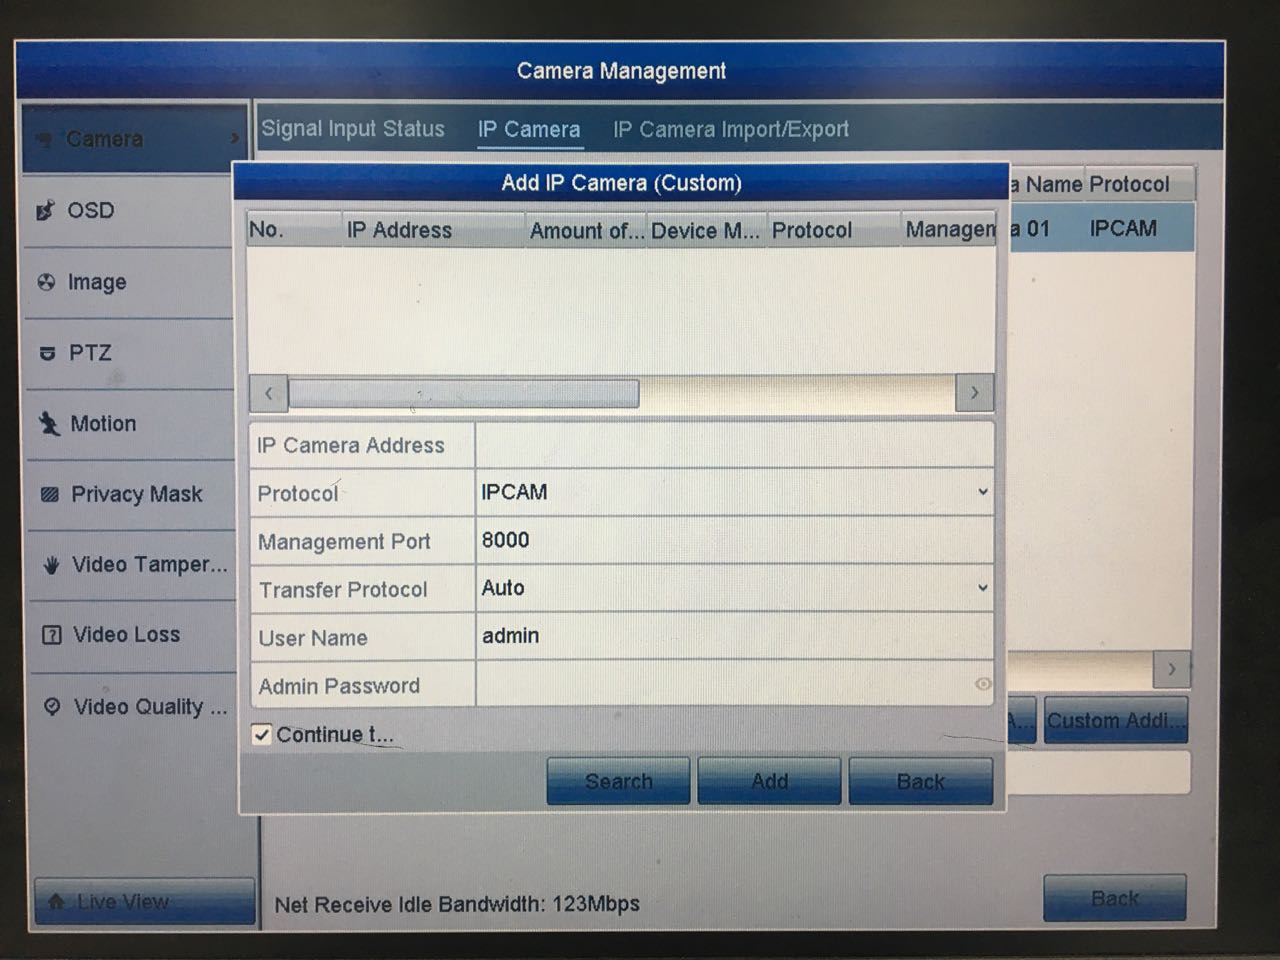
- You can edit the IP address, protocol, management port, and other information of the IP camera to be added.
Note: If the IP camera to add has not been activated, you can activate it from the IP camera list on the camera management interface. - Click Add to add the camera.
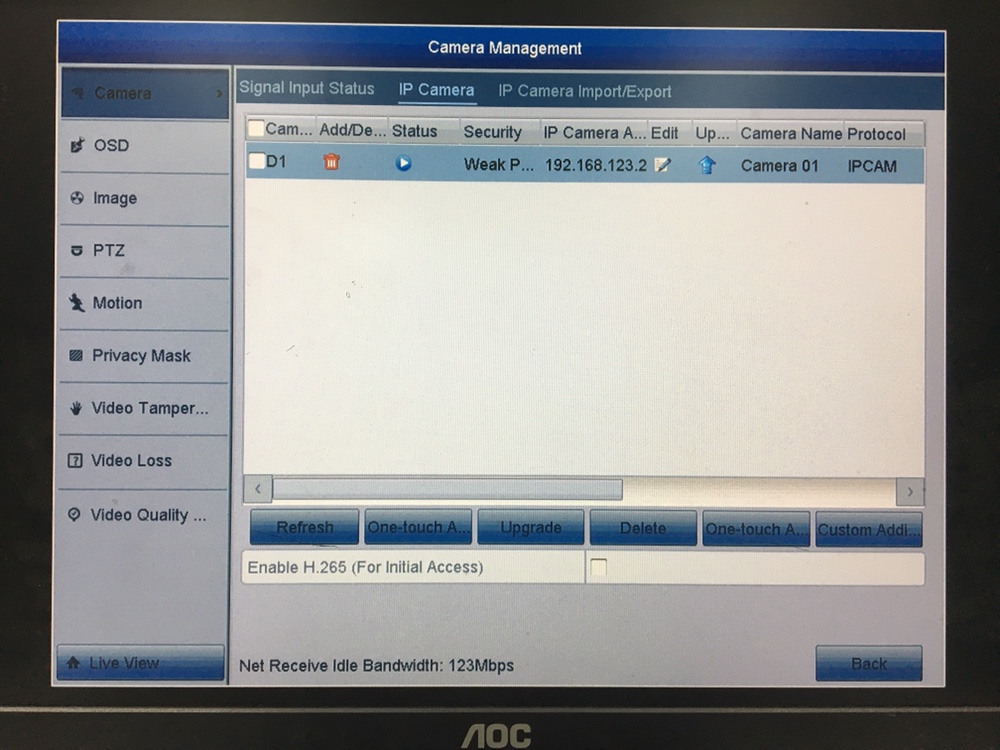
Note: For the successfully added IP cameras, the Security status shows the security level of the password of the camera: strong password, weak password, and risk password.
The icons of the below table show on the Camera Management interface appearing the status of cameras.
| Icon | Explanation | Icon | Explanation |
| Edit the basic parameters of the camera | Add the detected IP camera. | ||
| The camera is disconnected; you can click the icon to get the exception information of the camera. | Delete the IP camera | ||
| Play the live video of the connected camera. | Advanced settings of the camera. | ||
| Upgrade the connected IP camera. | Security | Show the security status of the camera to be active/inactive or the password strength (strong/medium/weak/risk) |
Was this article helpful?
Bu bilgiler sorununuzu çözmeye yardımcı oldu mu?
Thanks for your feedback!
Still need help?
Uzman ekibimiz size yardımcı olmak için burada.