To add license plate recognition (LPR) you'll need to setup one of 2 options:
Using LPR software.
Using a compatible LPR camera.
LPR System | Advantages | Disadvantages |
Software | - Contains detailed data such as make, model etc. | - Require dedicated server running 24/7 on site |
Camera | - Only need the camera | - Typically less accurate |
LPR Cameras (Axis and Milesight)
Axis LPV
First you'll need a compatible Axis LPV camera. Make sure to follow the Axis LPV user manual when it comes to setup. It's important to have the proper setup for the optimal license plate detection.
To setup the integration with Axis LPV follow these steps:
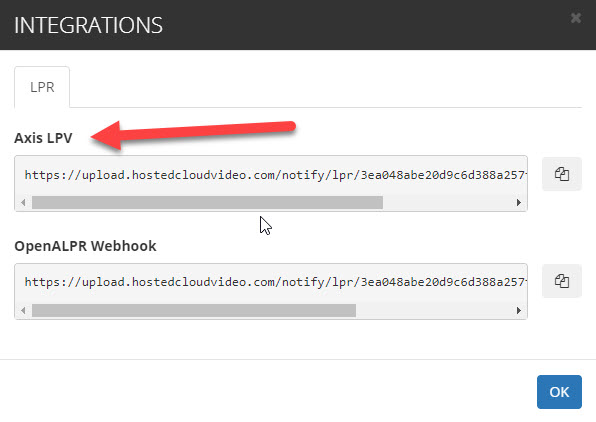
Go to the Integrations menu for your Axis camera in your portal.
Copy the URL
Navigate to the Axis LPV app and go to the Integrations tab:
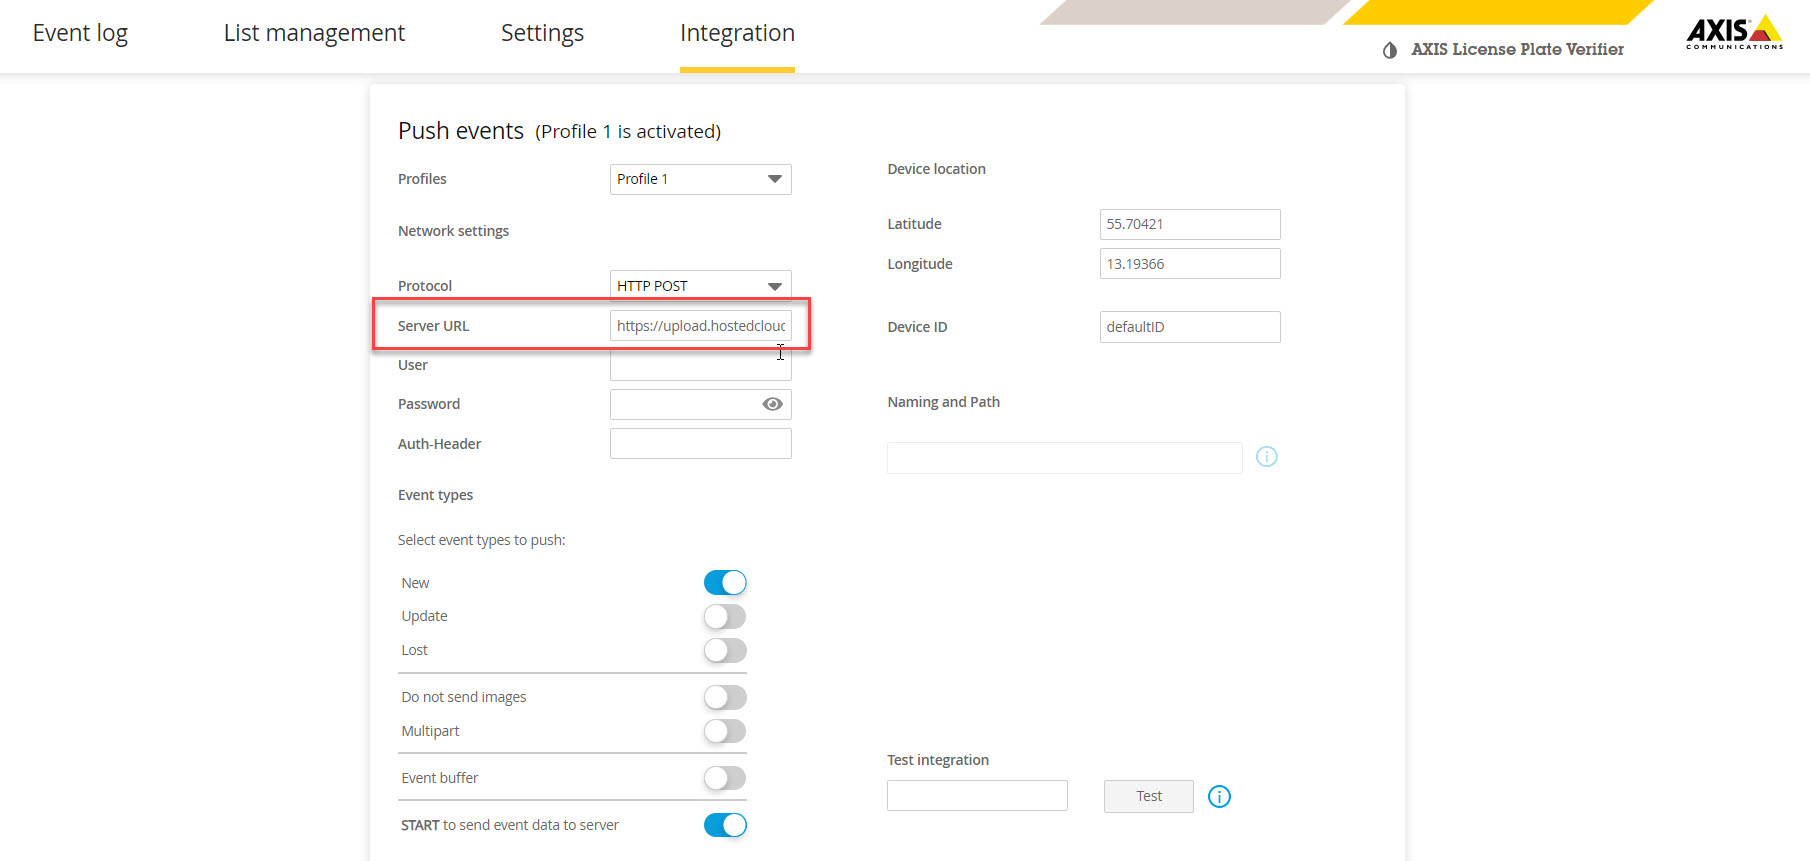
Change Protocol to: HTTP POST
Paste the URL you just copied from the Integrations menu
Make sure "New" is selected
Deselect "Multipart" and "Event buffer"
Select "Start to send event data to server"
Note: It may start you on the LPV wizard. Choose Free Flow as the first option and the rest should be the default (depending on your requirements) except the Integrations tab.
Milesight LPR
You'll need a compatible Milesight camera. See the applicable firmware found here.
First install the correct firmware.
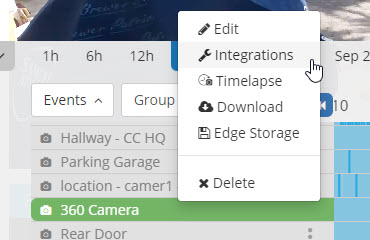
From the Camcloud portal, locate your camera on the bottom-left menu then right-click on the two dots:

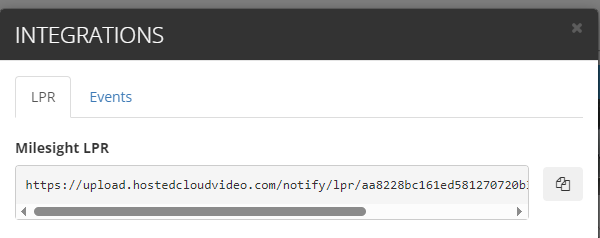
Click on Integrations

In the LPR tab, copy the URL
5. Access your Milesight camera UI and go to Setting>Data Transmission> Post tab and then add the URL in the URL textbox
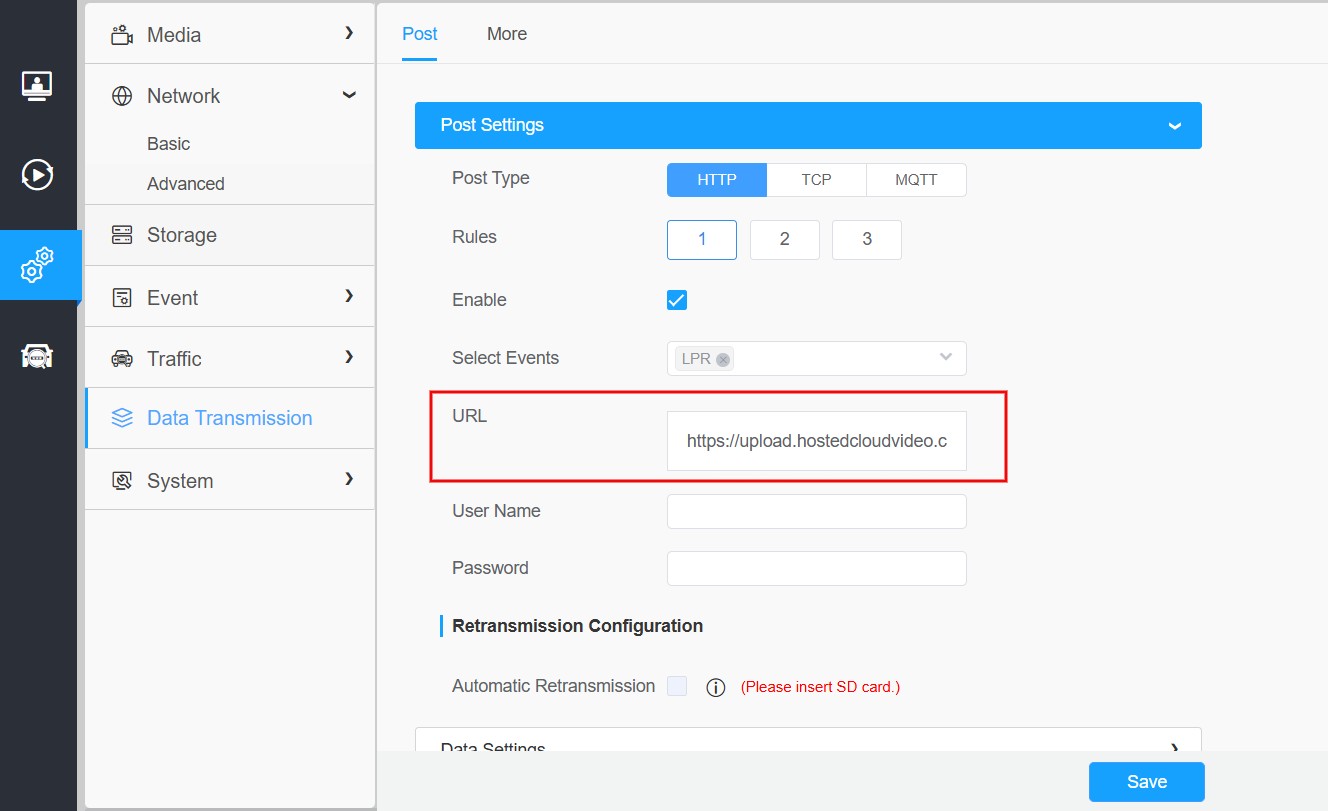
Click Save.
LPR events can be viewed and searched upon in the Event Explorer.
LPR Software
Rekor Scout
In order to use Rekor Scout it will require you to install onsite hardware. Rekor Scout has a software package that can be installed on Windows or Linux. Contact Rekor for setup options. In addition you'll need a valid subscription.
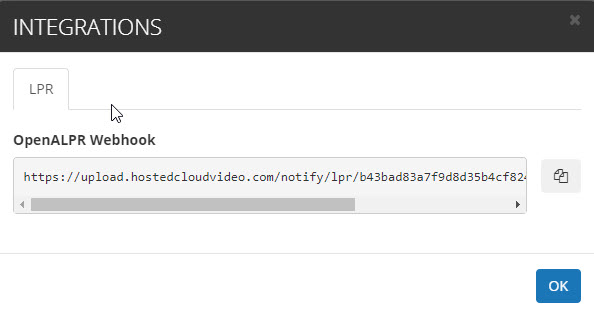
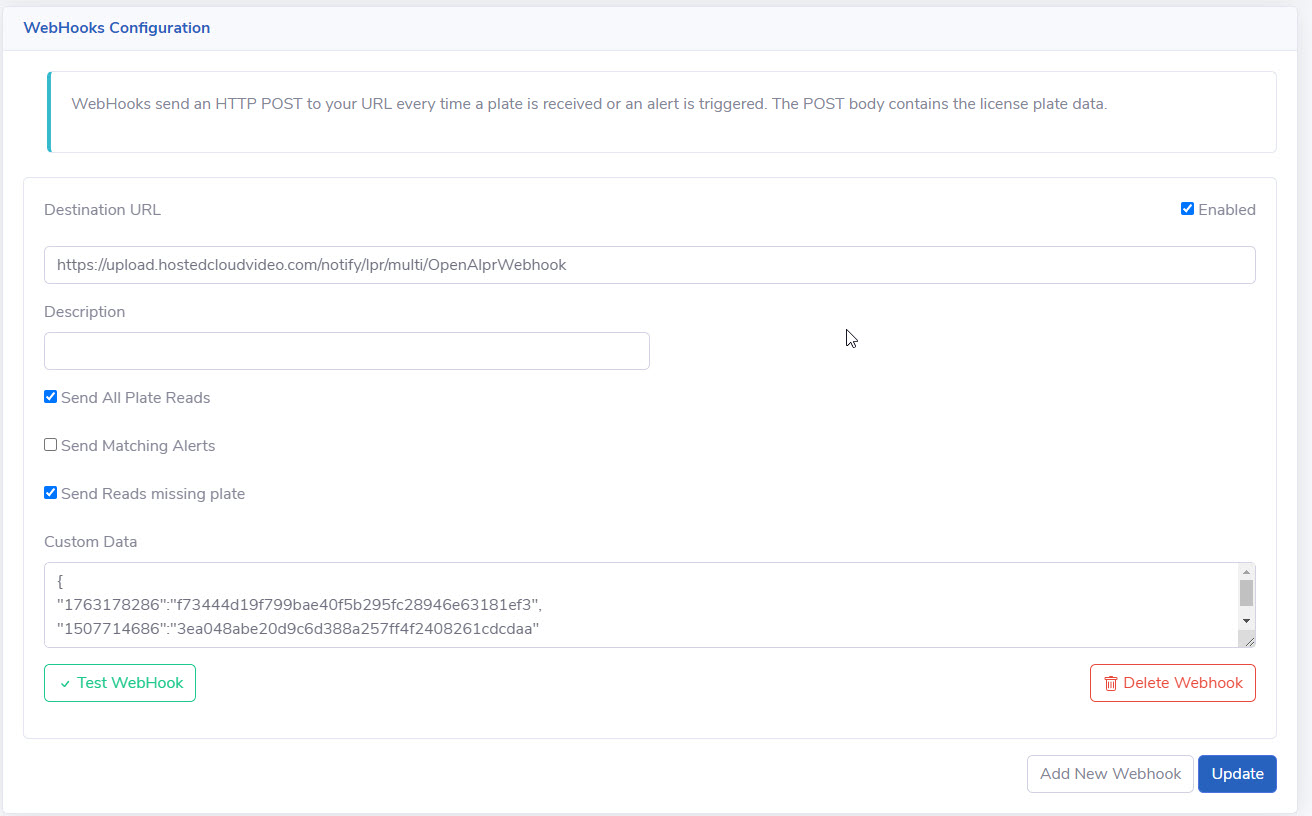
Once you have Rekor Scout setup and you have added the camera(s) you can add the Webhook. You can use any type of camera as long as it has an RTSP stream. Under the Rekor Scout setup page: https://cloud.openalpr.com/ - Go to the Webhook menu found under the Configuration menu:
In the Destination URL you will enter the full URL provided under the Integration menu. Log into your portal and go to the Integrations menu:
Select the options:
Send All Plate Reads
Send Reads missing plate (optional and only if you want results of missing plates)
Click Update and you are set to go.
If you have multiple cameras you would need to add Custom Data. Follow these steps:
Find the camera ID on Rekor Scout in your OpenLPR account. Dashboard -> Cameras (View Details) -> Configure -> Configure (next to video stream) -> ID is found at the top.
Go to the Integrations menu and copy the long string in between /lpr/<Camcloud camera ID>/OpenAlprWebhook
Under the Custom Data field in the Webhook configuration - add the following format:
{
"Rekor camera ID of camera #1":"<Camcloud camera ID of camera #1>"
"Rekor camera ID of camera #2":"<Camcloud camera ID of camera #2>"
)
Now you can enjoy LPR results in the Event Explorer.
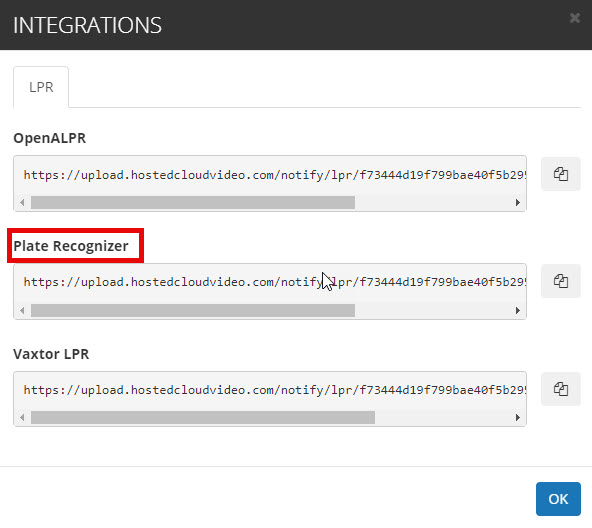
Plate Recognizer
As part of its support for advanced License Plate Recognition (LPR) platforms, Camcloud offers an integration with Plate Recognizer, specifically its Stream application.
When using Plate Recognizer with Camcloud, Plate Recognizer will be configured to run on-premise alongside your IP cameras that you have dedicated for license plate detection.
In order to use Plate Recognizer it will require you to install the software on available local hardware and obtain a license from Plate Recognizer at https://platerecognizer.com/contact/
Plate Recognizer works with any IP camera; install software on-premise on Windows, Linux, Mac, Jetson or Pi. Please read their setup guide to successfully complete the initial software installation.
How to Configure Plate Recognizer for use with Camcloud
Ensure the camera you wish to use for plate detection is connected to Camcloud and configured for 24x7 continuous recording.
Open the Integrations menu for this camera and copy the Webhook URL to your clipboard.

3. Now you must configure Plate Recognizer to publish its LPR data to Camcloud. Open the Plate Recognizer config.ini file and insert the following configuration blocks listed below.
config.ini - cameras section
mmc = true - required for make/model/color
detection_mode = vehicle - Required setting for analysis
[cameras]

regions = ca, us

...

mmc = true

...

detection_mode = vehicle   REQUIRED setting

...
config.ini - cloudCamera section
[[cloudCamera]]

 active = yes

 url = rtsp://<user>:<pass>@<ip>:<port>/<path>

 webhook_targets = cloudWebhook
config.ini webhooks section (configure upload to Camcloud)
[webhooks]

 caching = yes

 [[cloudWebhook]]

   url = <webhook_url_from_step_2>

   image = yes

   image_type = original

   request_timeout = 30
The webhook URL was copied from Step 2; just paste into this command.
Note: Make sure timezone=UTC (that will be the default). That will be outside the cameras section.
Plate Recognizer is now ready to push LPR detection results to Camcloud, making all your LPR data searchable alongside the 24x7 video recording.
Viewing LPR events in the Event Explorer
To view the LPR events simply open up the Event Explorer. You'll have a new LPR module in the filtering.
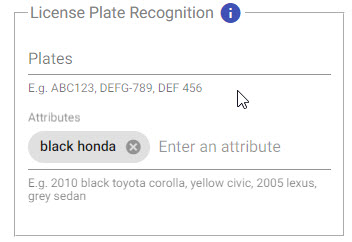
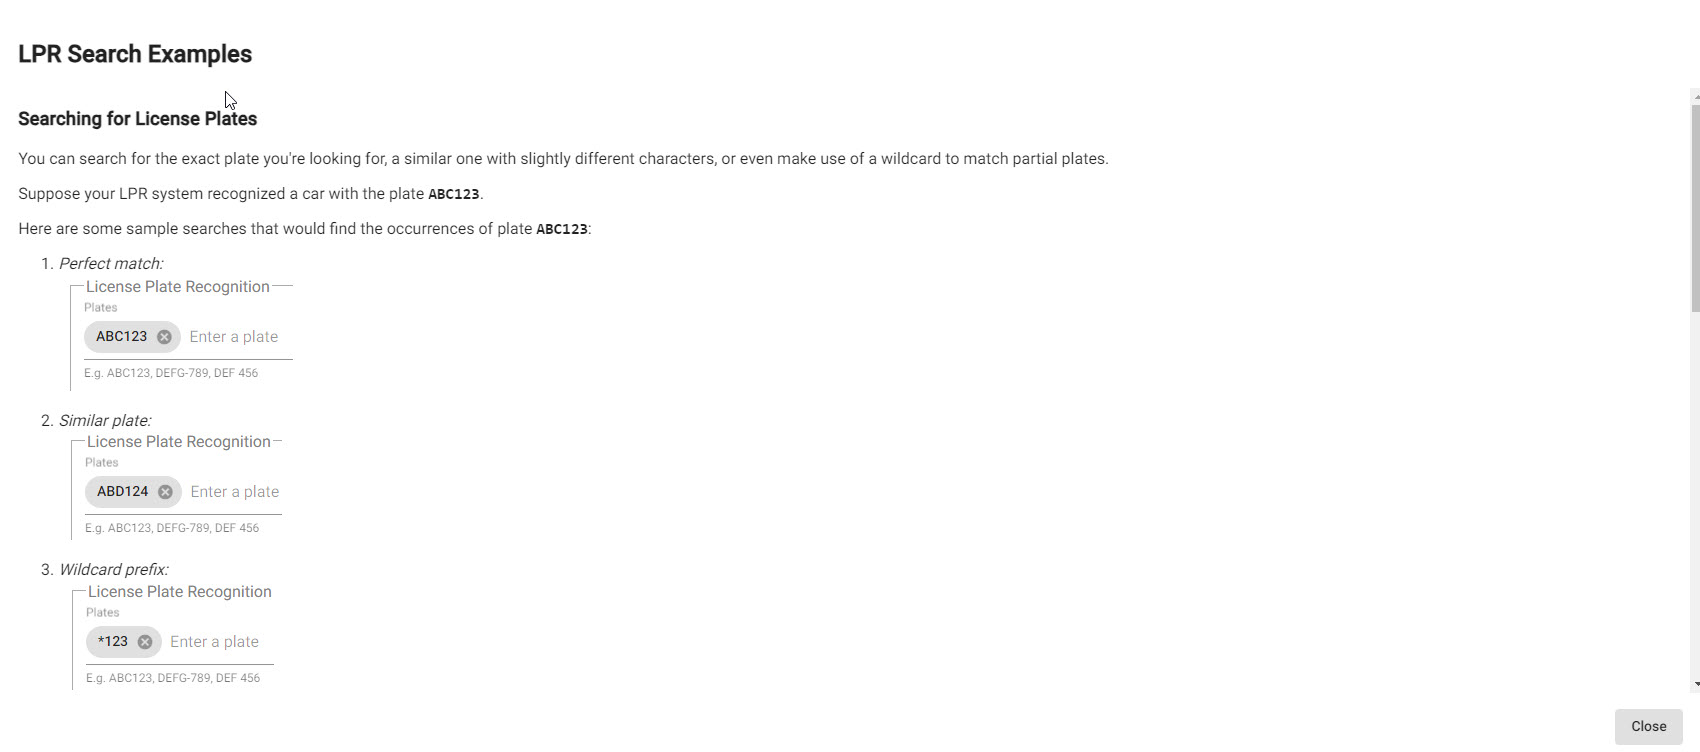
Here you can enter any type of value for a license plate and even use wildcard matches. In addition you can look for specific metadata such as color, make, model, etc. (depending on LPR system). To see the available search options click the help icon in the filtering.
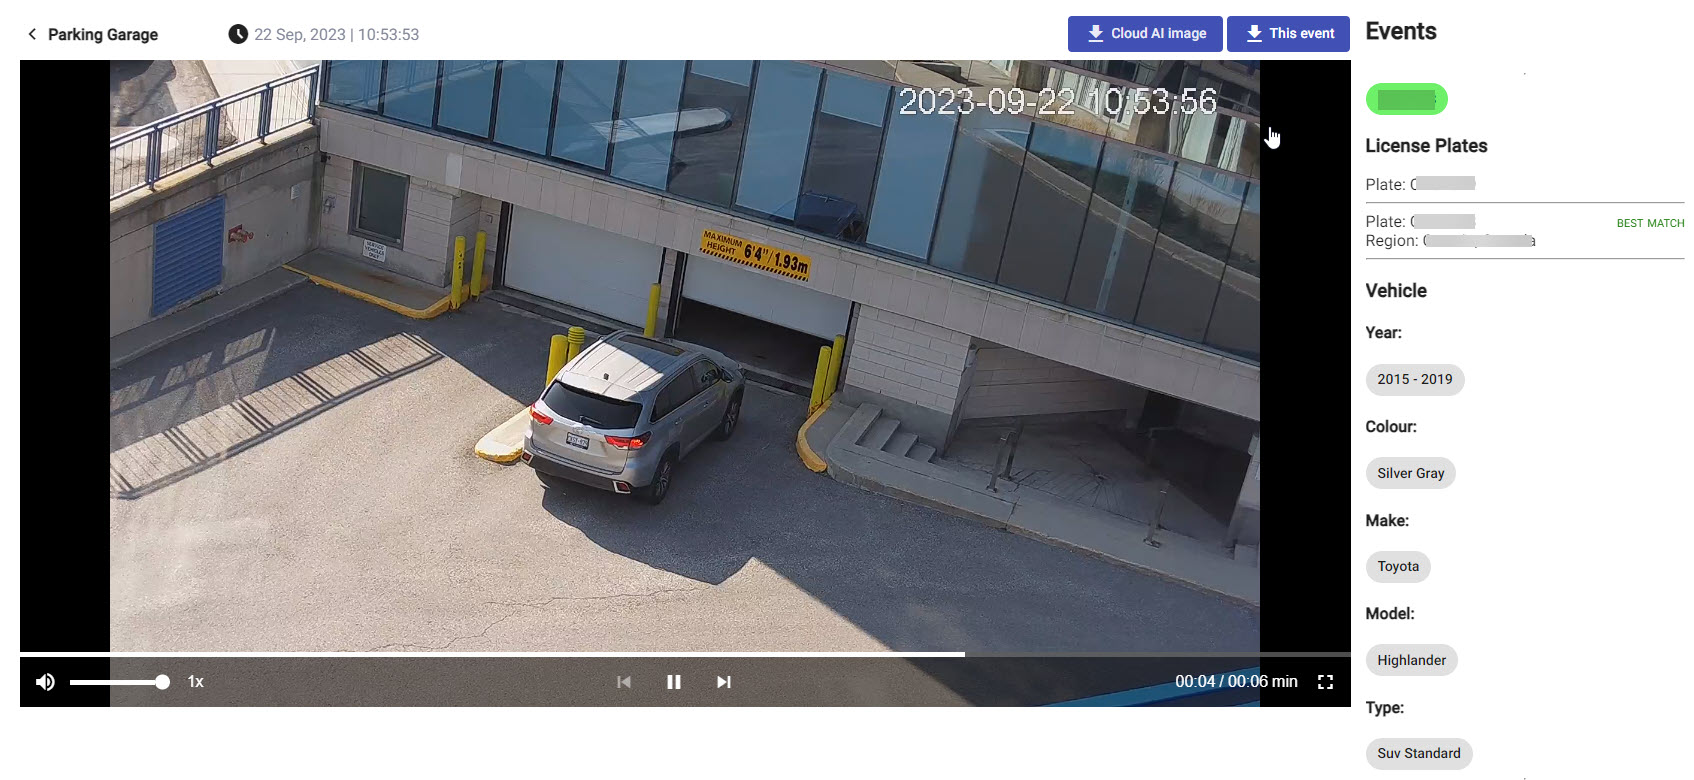
Once you have selected your search criteria you will get the full results:
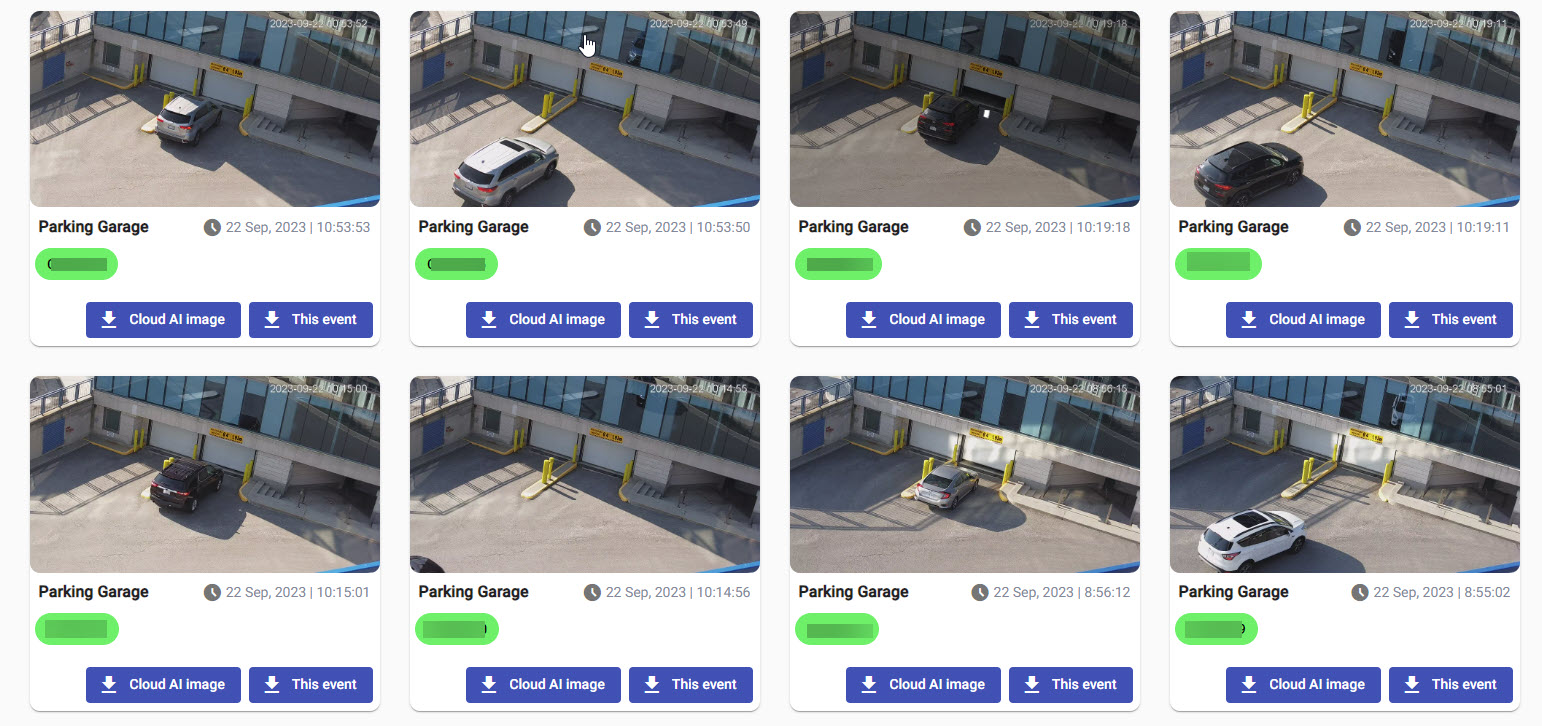
Click on any image to get the further details and the corresponding video:
Of course at this point you can download that information by clicking "This event".