[Windows-based NVRs][NR9X81] How to replace and set NVR SATADOM
01 May 2026
0 views
QUESTION
How to replace and set NVR SATADOM
ANSWER
IMPORTANT: please be sure to perform this procedure in the problematic NVR because as soon as the SATADOM is replaced and the device is turned ON it will register the NVR MAC address internally so that only that device can use it. If you accidentally replace the wrong SATADOM you will need to send it back so that it can be reconfigured.
Installing steps:
After receiving the SATADOM from our repair representative, you will need to replace the existing one and then configure the NVR, to that please follow the next steps:
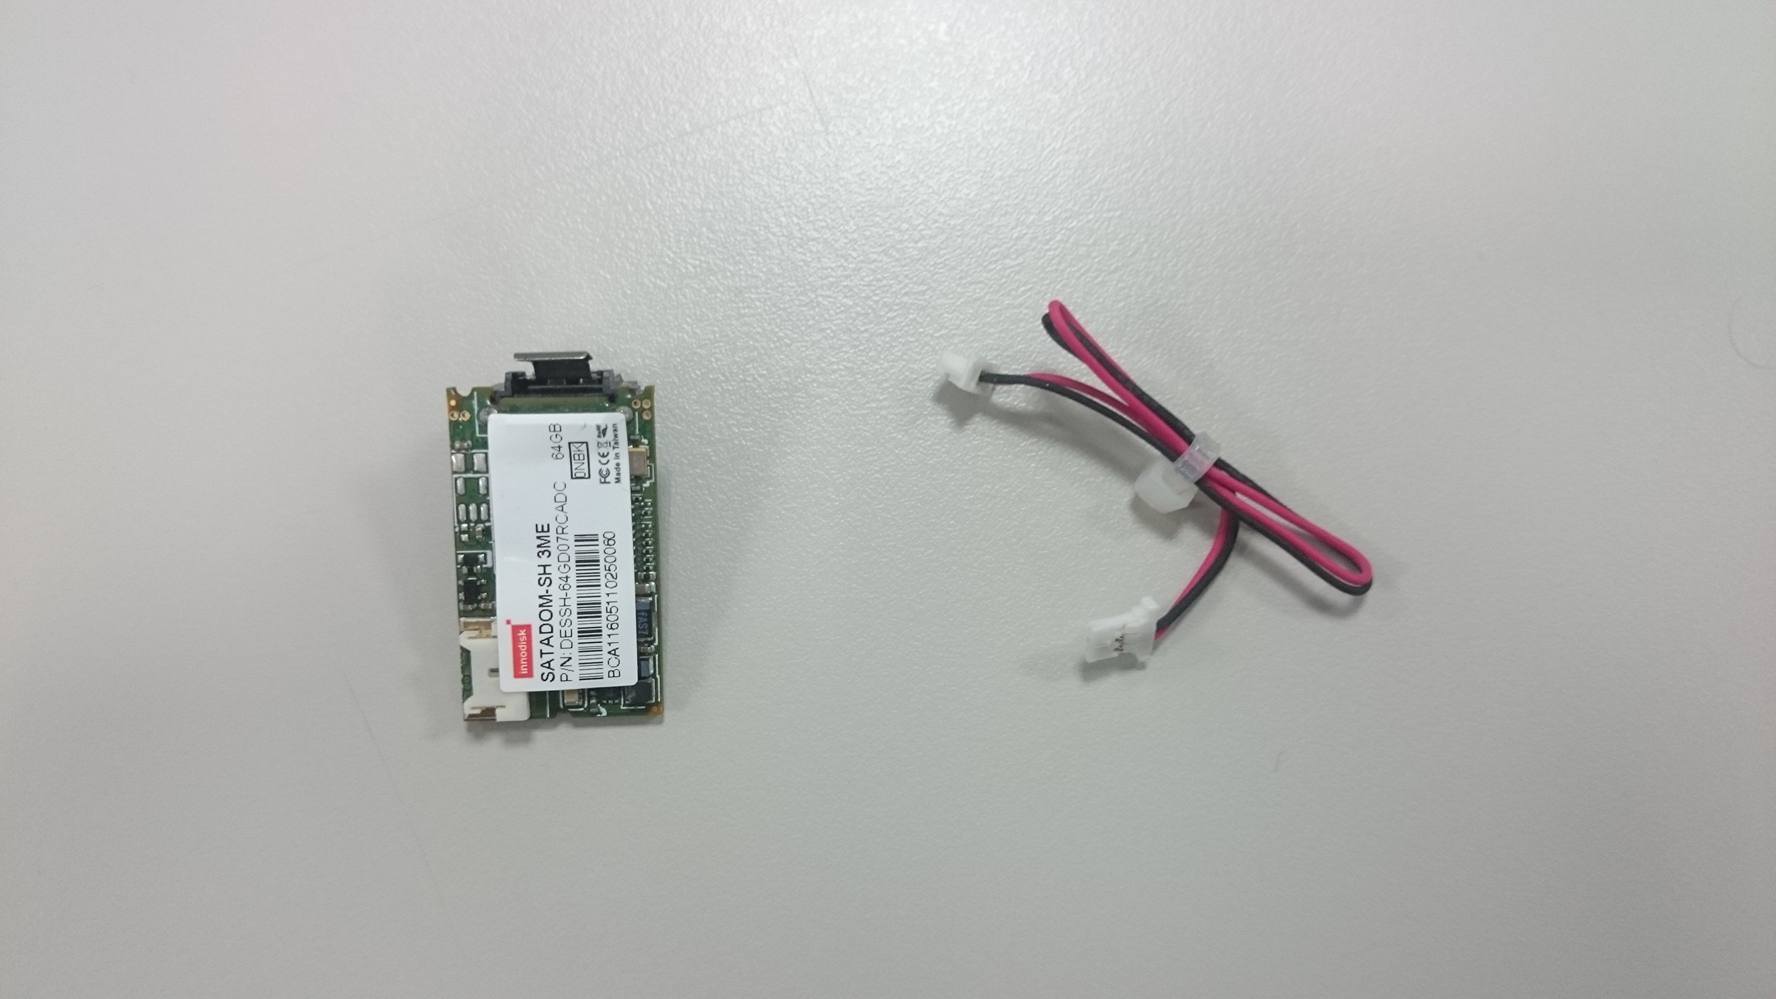
RMA replacement:
1 power cable
1 SATADOM
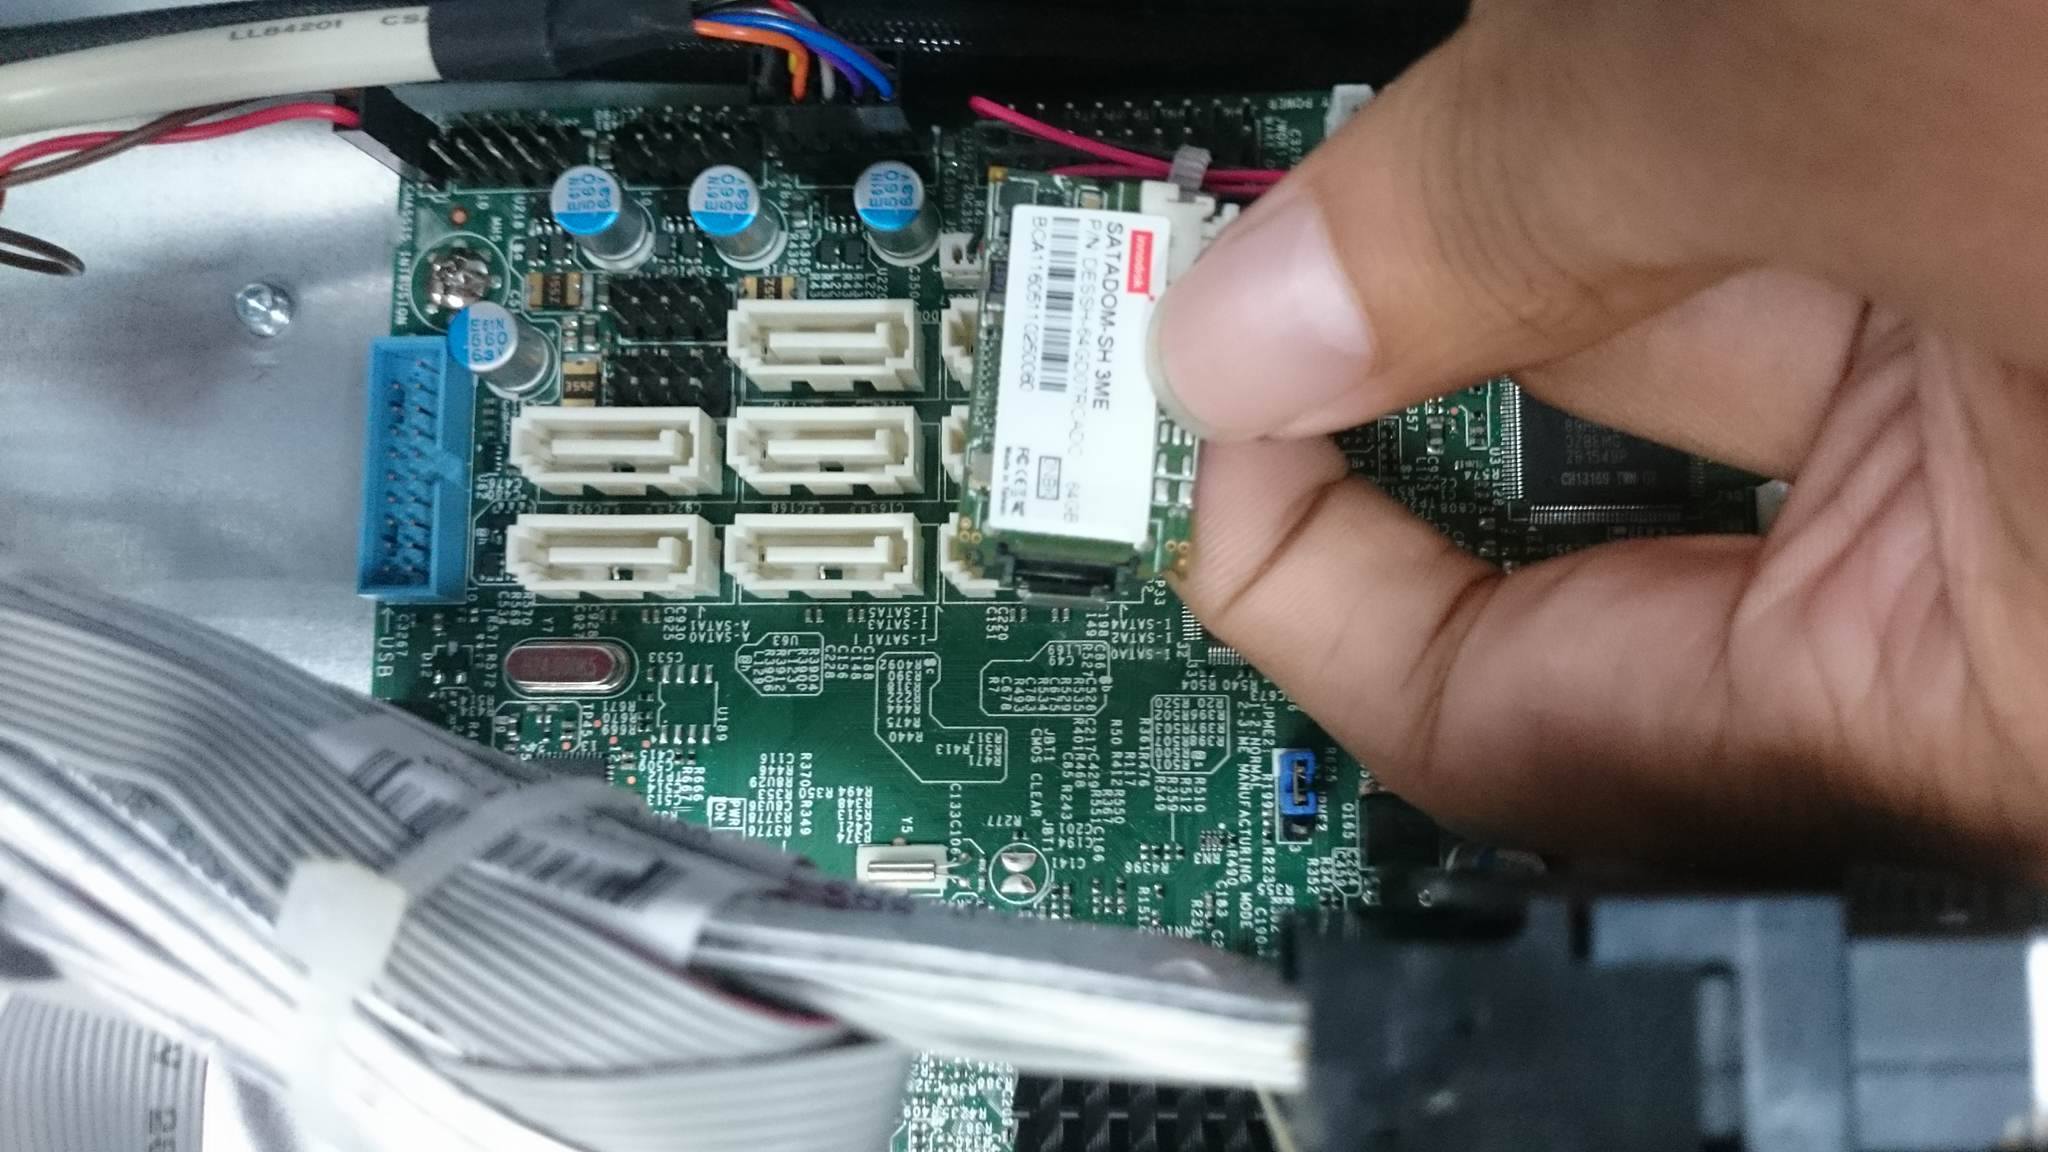
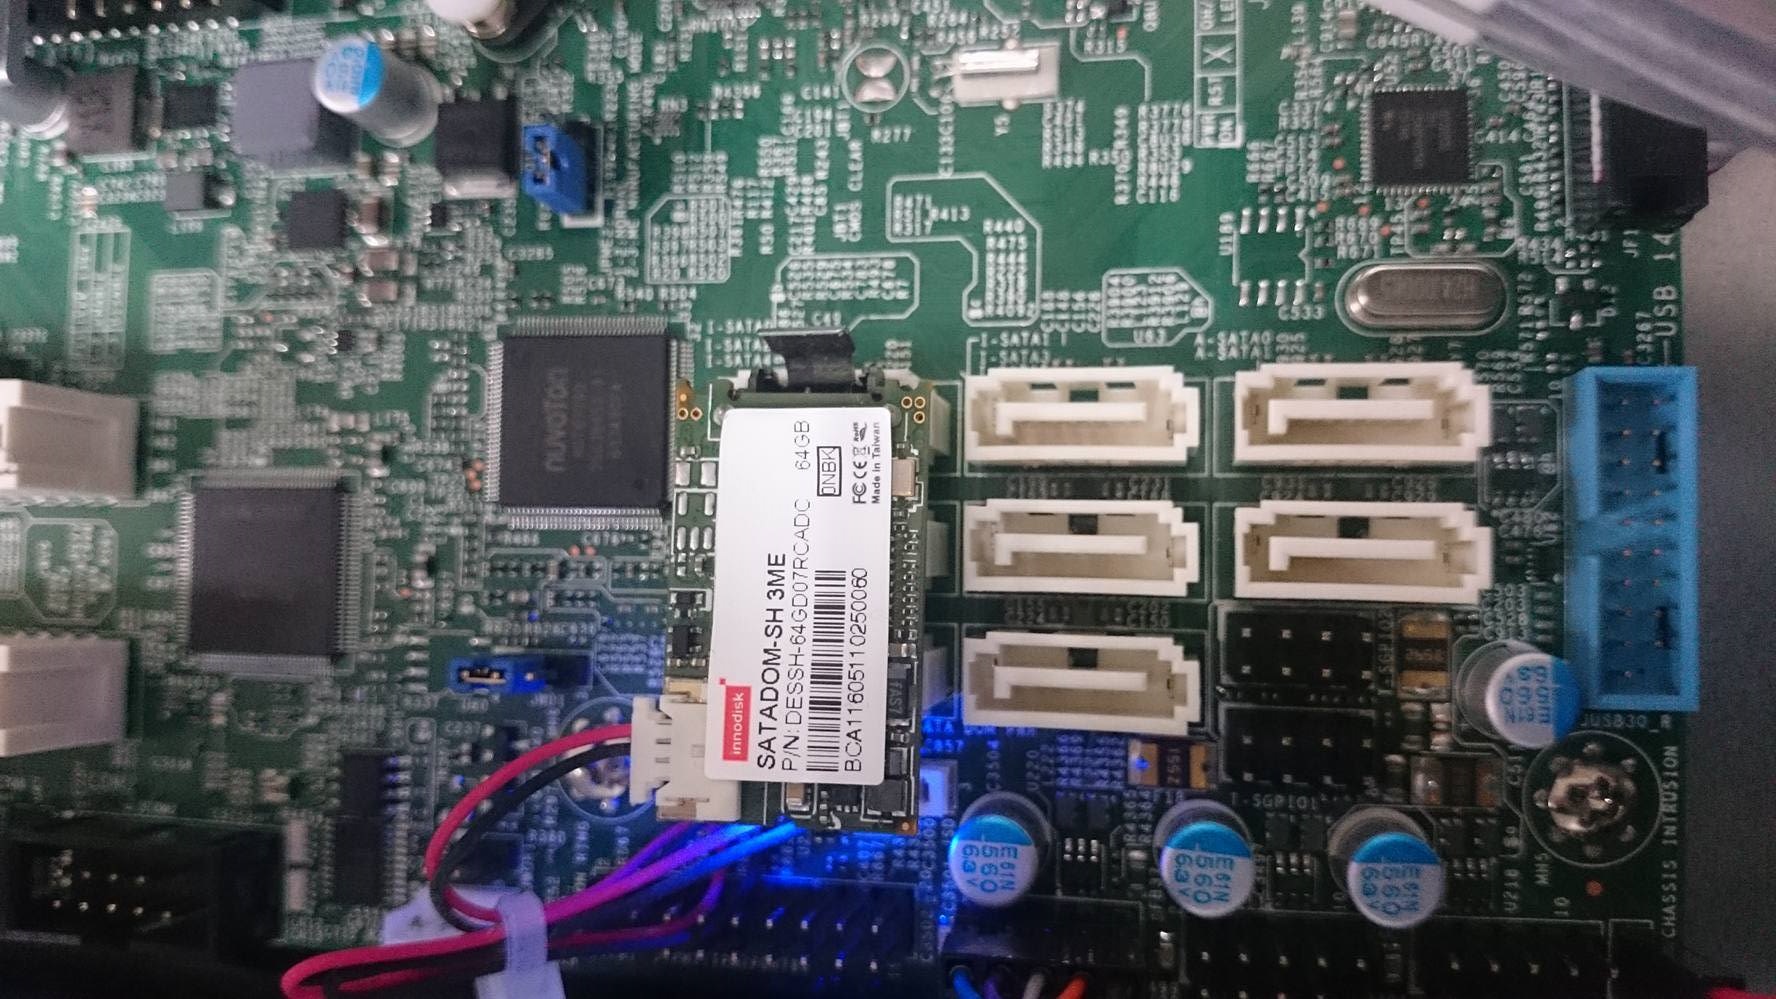
 1. Carefully pull out the damage SATADOM and its power cable. Note: be sure to power down the device before pulling out the SATADOM.
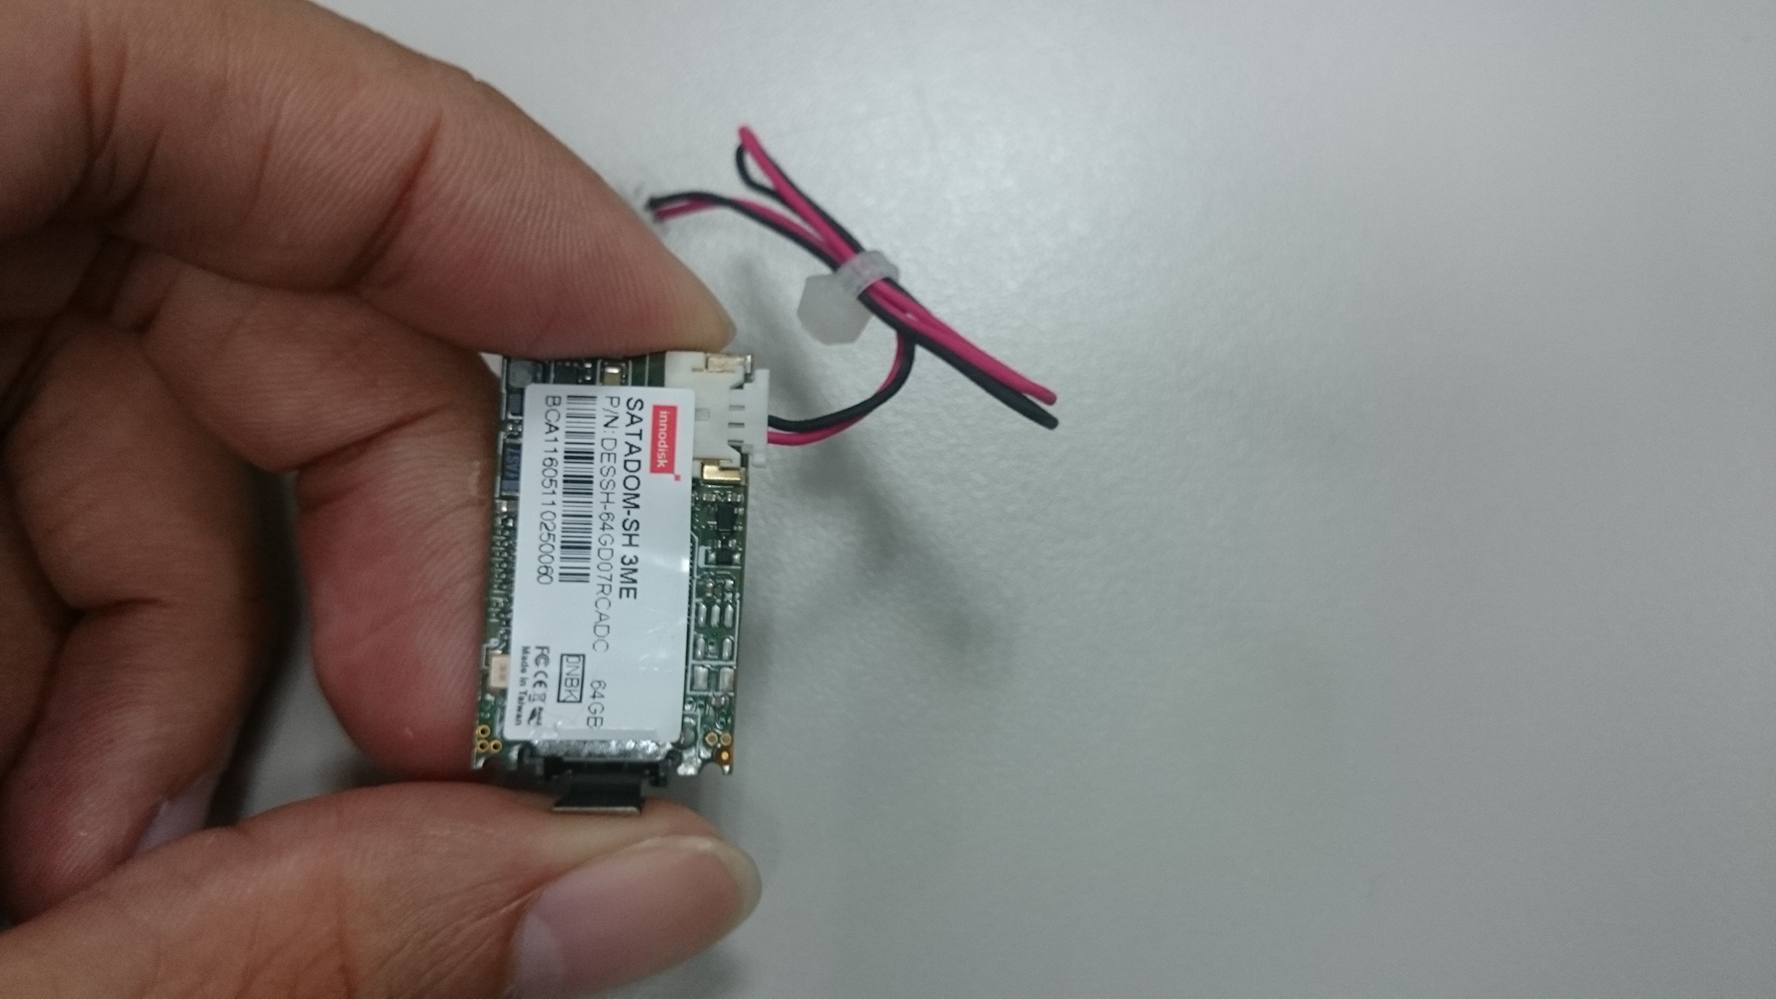
2. Connect the power cable to the SATADOM to the board. (Power cable is included inside the packet send by RMA).
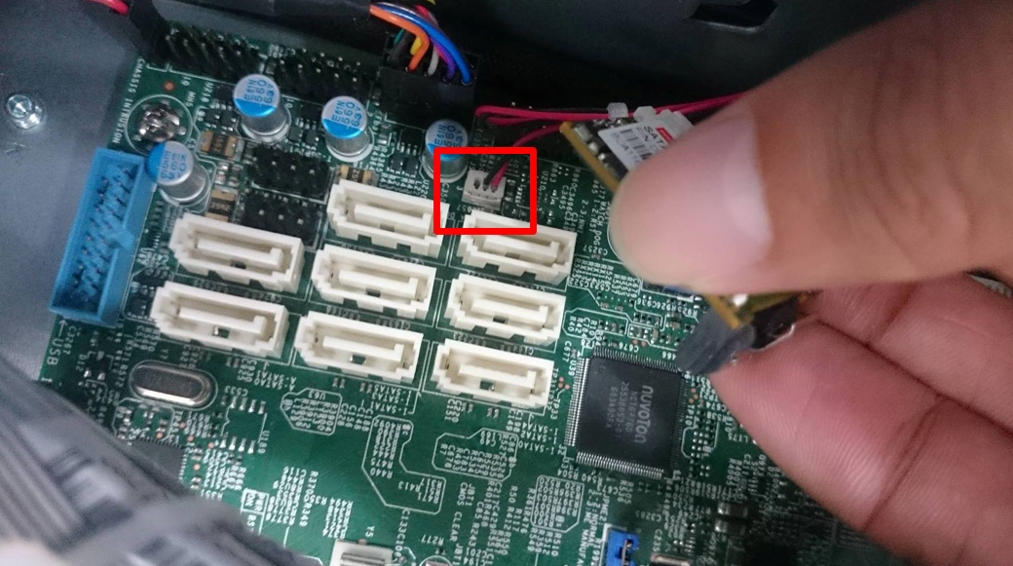
3. Connect the power cable of the new SATADOM to the board.
4. Connect the SATADOM in the same slot as the damaged one. Note: connecting the SATADOM to different slots should not affect functionality, but we recommend installing in the same slot.
5. Turn ON the device.

6. Wait until the NVR finished initializing (about 3 minutes), then you will see the following,

7. Select Enter NVR and press “Enter”. Note: this interface is normal, each time the NVR is initialized or restarted it will ask you to choose between these four options.
8. Wait until the OS finished the configurations, at this point it will also register the device MAC into the SATADOM and install the Licenses in the system.

When the process is finished, a popup will appear informing that the process of installation has been completed.

The information regarding the device model name, licenses, VAST version and MAC address will be show as well (see picture below)
9. Press OK to turn off the NVR.
Installing steps:
After receiving the SATADOM from our repair representative, you will need to replace the existing one and then configure the NVR, to that please follow the next steps:
RMA replacement:
1 power cable
1 SATADOM
2. Connect the power cable to the SATADOM to the board. (Power cable is included inside the packet send by RMA).
3. Connect the power cable of the new SATADOM to the board.
4. Connect the SATADOM in the same slot as the damaged one. Note: connecting the SATADOM to different slots should not affect functionality, but we recommend installing in the same slot.
5. Turn ON the device.
6. Wait until the NVR finished initializing (about 3 minutes), then you will see the following,
7. Select Enter NVR and press “Enter”. Note: this interface is normal, each time the NVR is initialized or restarted it will ask you to choose between these four options.
8. Wait until the OS finished the configurations, at this point it will also register the device MAC into the SATADOM and install the Licenses in the system.
When the process is finished, a popup will appear informing that the process of installation has been completed.
The information regarding the device model name, licenses, VAST version and MAC address will be show as well (see picture below)
9. Press OK to turn off the NVR.
Was this article helpful?
Bu bilgiler sorununuzu çözmeye yardımcı oldu mu?
Thanks for your feedback!
Still need help?
Uzman ekibimiz size yardımcı olmak için burada.