Annke Vision - Set up Recording Schedule on Annke DVR/NVR
Applies to: DT41Y/DT61Y/DT81Y/DN41R/DN61R/DN81R/DT41GB/DT81GB/DT61GB/DT41DB/DT81DB/DT61EQ/DW41JD/DW81KD/DW61LD/DT81DP/N48PI/N44PI/N46PI/N44PAM/N48PAW/N46PCK/N88PCH/N441Y/N481Y/NCK800/H800/H500
Purpose:
Set the scheduled recording, and then the camera will automatically start/stop recording according to the configuration of the schedule.
Before you start:
- You should log in to your DVR/NVR.
- Click Menu> Record>Schedule
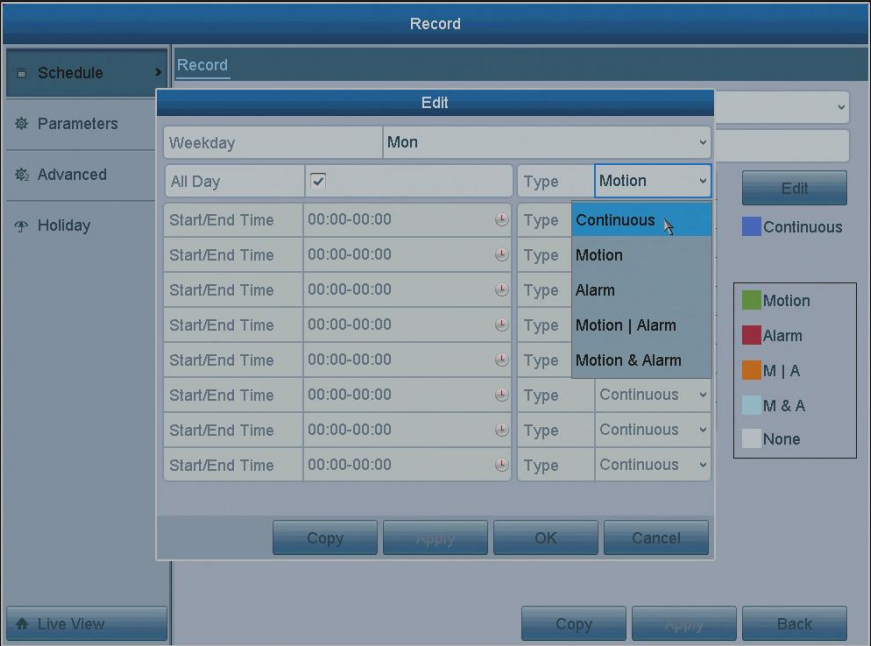
The interface of Record:
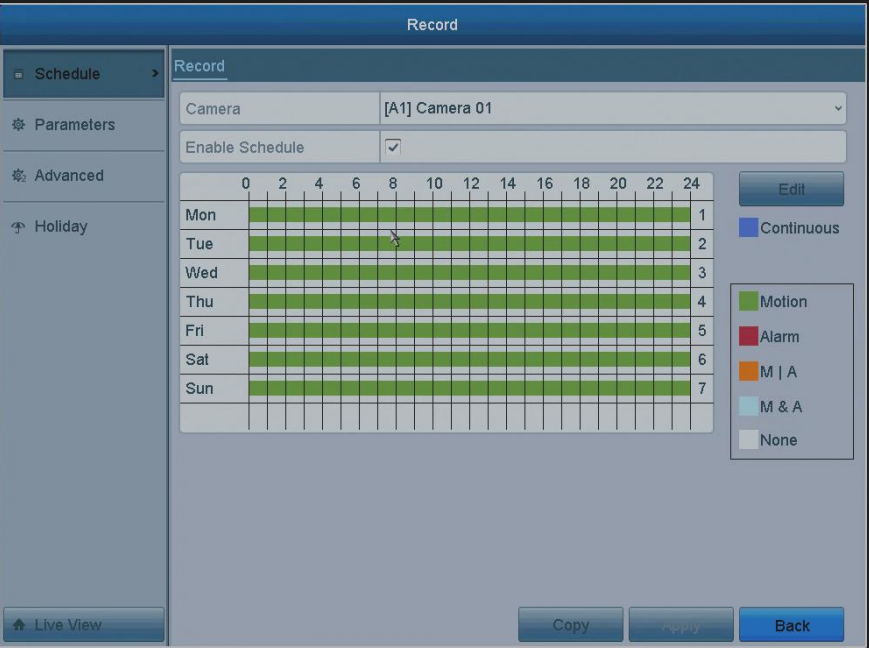
Camera: choose the camera you want to configure.
Enable Schedule: Must Tick the checkbox and enable the recording schedule.
Edit: Edit the schedule, the detailed description shows below.
Different recording types are marked in different color icons.
Continous: scheduled recording.
Event: recording triggered by all event-triggered alarm.
Motion: recording triggered by motion detection.
Alarm: recording triggered by alarm.
M/A: recording triggered by either motion detection or alarm.
M&A: recording triggered by motion detection and alarm.
- The Alarm, Motion & Alarm, and Motion | Alarm recording types don't support all series DVR/NVR.
- You can also use the mouse to click on the color icon to select a record type, click and drag the mouse on the schedule process bar to set up the recording schedule.
Edit the schedule: click the Edit button.
-
Weekday: Choose the day to which you want to set a schedule. (Monday to Sunday)
Note:
The Holiday option is available as the Weekday Type when you enable holiday schedule in Holiday settings.
It is as the highest priority: The system will give priority to carry out the holiday setting plan, the other Monday to Sunday setting plans will be invalid. (How to enable holiday recording?)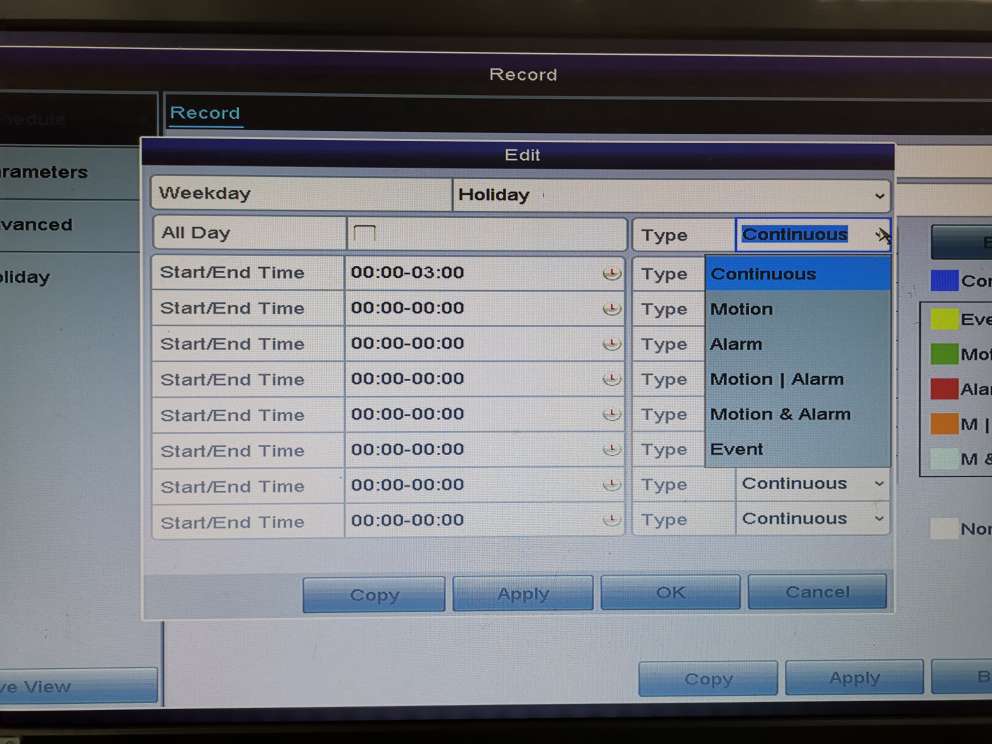
-
To schedule an all-day recording, check the All Day item checkbox.
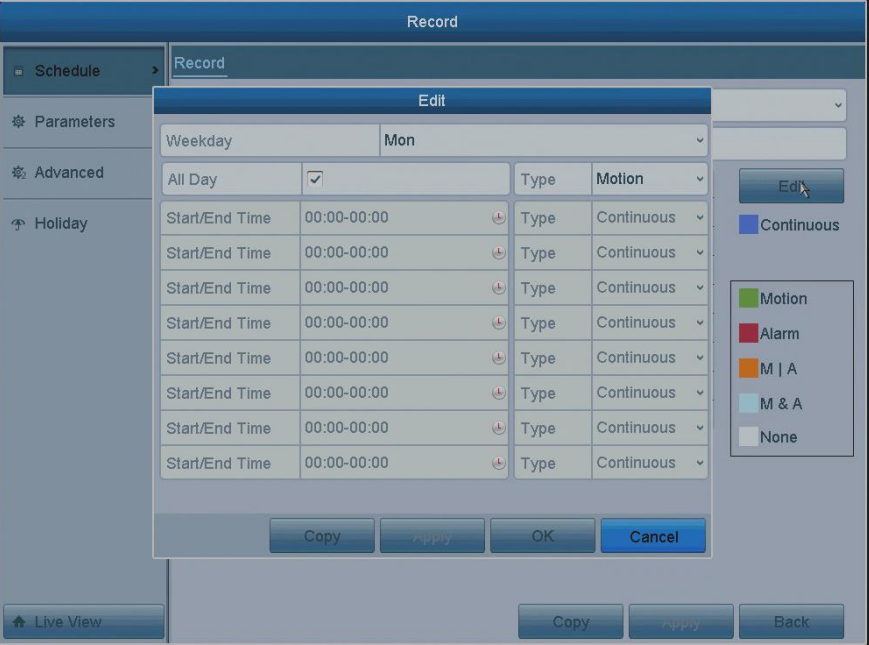
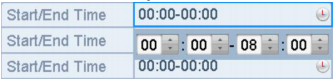
- To arrange another schedule, leave the All Day checkbox blank and set the Start/End time.
Notes:
Up to 8 periods can be configured for each day. And the time periods cannot be overlapped with each other.
Repeat the above steps to schedule a recording for other days in the week. If the schedule can also be set to other days, click Copy. - Select the record type in the drop-down list (Continuous, Motion).
- Click Apply to save the settings and then click OK to back to the upper-level menu.
Was this article helpful?
Bu bilgiler sorununuzu çözmeye yardımcı oldu mu?
Still need help?
Uzman ekibimiz size yardımcı olmak için burada.