What is Virtual Matrix on VAST?
QUESTION
ANSWER
Introduction
VIVOTEK provides a professional video wall solution, Virtual Matrix, a new feature in VAST version 1.5. Since its introduction, Virtual Matrix has been upgraded to support live views of an unlimited number of channels from the previous 64 channels. In addition, live views on an unlimited number of screens for an unlimited number of cameras are available, whereas the original version supported a maximum of 2 screens.
This document provides a general introduction to VAST Virtual Matrix along with explanations of how to set it up.
What is VIVOTEK Virtual Matrix?
The Virtual Matrix feature has been added to VAST to enable a more powerful surveillance setup in the central control room through support of multiple monitors.

LiveClient and VAST server work with Virtual Matrix to display an unlimited limited number of channels on an unlimited number of screens.
We have implemented the Matrix recipient control in LiveClient, allowing the user to control and configure Virtual Matrix. The Virtual Matrix recipient will be installed on other computers with multiple screens.
When LiveClient logs into the server, the user can set up a connection to the Virtual Matrix recipient, which needs to be started up first.
Once connected, the user can display the cameras on the screens of other computers through simple point-and-click operations. There is no limit to the number of screens, recipient connections, or camera feeds that can be displayed.


Why Use Virtual Matrix?
- Powerful
- Unlimited number of channels - Virtual Matrix removes the upper limit of 64 viewable channels, allowing you to view an unlimited number.
- Unlimited number of screens - The upper limit of 2 screens for displaying channels has been removed, allowing an unlimited number of screens to be used for displaying feeds from an unlimited number of cameras.

- Superior picture quality and coverage - For improved surveillance, Virtual Matrix provides not only extremely clear and detailed picture quality, but also much expanded coverage with advanced cameras of 2-megapixel resolution or higher.

- Easy to Use
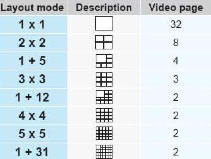
- Flexible arrangement of selected camera feeds - Click the Layout button on the quick access bar. Select the desired layout mode and the arrangement of the channels will change accordingly. Eight layout modes and the corresponding number of video pages are listed below.

- Rotate camera for greater coverage The video pages will start to rotate so that the user does not have to click to move to the next page.
- Drag-and-drop support cell. To move a video channel to an empty video cell, simply drag the view to the desired

To exchange the locations of two channels, drop one view onto the other.
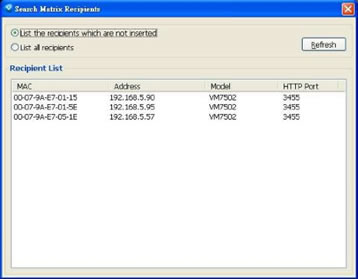
- Easy searching Click to search for VAST Matrix recipients on the LAN.

- Flexible arrangement of selected camera feeds - Click the Layout button on the quick access bar. Select the desired layout mode and the arrangement of the channels will change accordingly. Eight layout modes and the corresponding number of video pages are listed below.
- Other Benefits
- Each VAST Matrix supports up to 10 monitors and 320 channels.
- Supports Key Frame Only mode - This mode allows VAST Matrix to receive all video frames, but only decode and display the key frame.
- Supports virtually all VIVOTEK products VAST Matrix supports all VIVOTEK cameras, NVR, and video servers (except NR7401).
- Low cost - Allows monitoring of numerous cameras feeds using only a few computers.
Minimum System Requirements
Before installing the VAST Matrix, please make sure your system meets the following recommended minimum system requirements.
| Channels | Fewer than 16 channels | 16 ~ 32 channels | 32 ~ 40 channels | More than 40 channels |
| CPU | Core 2 Dual E6400 2.13GHz or above | Core 2 Dual E8600 3.33GHz or above | Core 2 Quad Q6600 2.4GHz or above | Core i7 |
| RAM | 2GB or above | 3GB or above | 4GB or above | |
| NIC | Ethernet, 1Gbit recommended | |||
| Graphics Adapter | AGP or PCI-Express, minimum 1024x768, 16 bit colors Minimum 128MB Video RAM, 512MB recommended | |||
How to set up Virtual Matrix?
- Activating VAST Matrix After installing the VAST Matrix program, which runs as a standalone Windows, application on the remote computer, follow the steps below to activate it:
- Run the VAST Matrix program.

- By default, a single camera feed is displayed full-screen.


- Run the VAST Matrix program.
- Settings of VAST - After running VAST Matrix, you must go to VAST to set up the settings of Matrix.
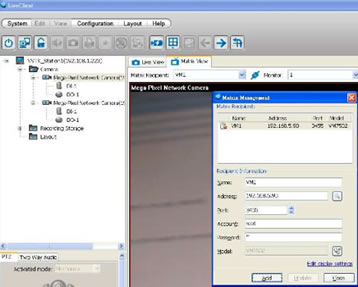
- Run the VAST LiveClient program.


- Click Matrix View, and then select Configuration > Virtual Matrix Management > Matrix Management... to bring up the setup window.


- You can click to search for Matrix recipients on the LAN or add a new matrix recipient by entering its IP address, account name and password.


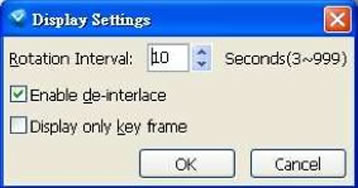
- Click "Edit display settings to bring up the Display Settings window, where you can set the rotation interval, enable de-interlace mode, and toggle the display key frame only feature on or off.
- Enablede-interlace:Enhancesthedisplayedvideoqualityforsomecamerasthat do not have built-in de-interlacing capabilities. (Note: Increases processing overhead.)
- Displayonlykeyframe:VASTMatrixwillreceiveallvideoframes,butwillonly decode and display the key frame. (Note: This setting will not have any effect if the codec used is MJPEG.)

- Click Add to add the new matrix recipient to VAST, and display information on the associated Matrix View.

- You can drag and drop a device from the hierarchical management tree to a Matrix video cell.

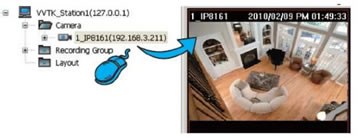
- Right-clicking in the video cell allows you to select the displayed stream. For multiple-stream devices, you can select individual streams.


- You can click the layout button to change the arrangement of channels on each monitor (up to 32 channels).


- Click Layout > Start Rotation on the menu bar (it will then change to Stop Rotation), or click the Rotation button . The video pages will start to rotate so that the user does not have to click to advance to the next page.
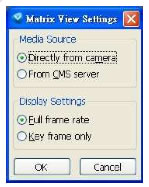
- In Matrix View Settings – Media source:
- Directlyfromcamera:EnablestheMatrixtofunctionindependently—forexample, allowing you to view the Matrix even when the VAST server is offline.
- FromCMSserver:Reducestheloadingincamera,butnotethattheMatrixwill not be functional without VAST.
- In Matrix View Settings – Display Settings:
- Fullframerate:Displaysvideoatthefullframerate.
- Keyframeonly:DisplaysonlythekeyframetoreduceCPUload.

- Run the VAST LiveClient program.
VAST Matrix settings
After you have completed setup of Virtual Matrix, you can go to VAST Matrix to further configure Matrix.
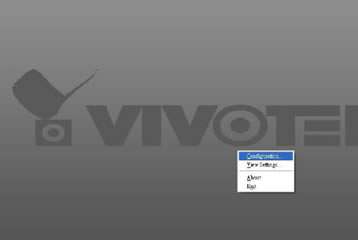
- Right-click anywhere in the window to bring up the popup menu. The menu contains the items Configuration, View Settings, About, and Exit.

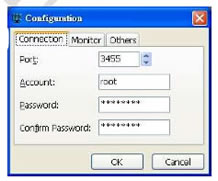
- In the Connection page of the Configuration window, you can change the port used by Matrix (the default is 3455), account (the default is root), and password.

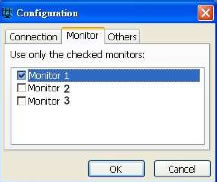
- In the Monitor page, you can select monitors for display.

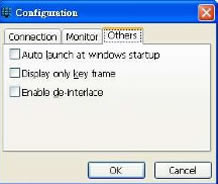
- In the Others page, you can enable various options.
- Auto launch at Windows startup: Enable this option to start VAST Matrix automatically when logging into Windows.
- Display only key frame: VAST Matrix will receive all video frames, but will decode and display the key frame. (Note: This setting will not have any effect if the codec in use is MJPEG.)
- Enable de-interlace: Enhances the displayed video quality for some cameras that do not have built-in de-interlacing capability. (Note: Enabling this feature will increase the processing load on the system.)

- In the View Settings window, you can set how individual video cells will be displayed.

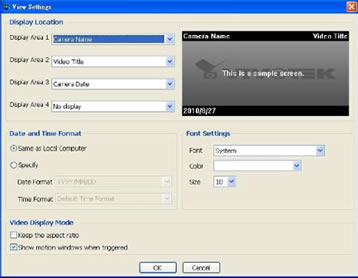
- If a user selects "Exit, it will close Matrix and VAST will not be able to control it further.
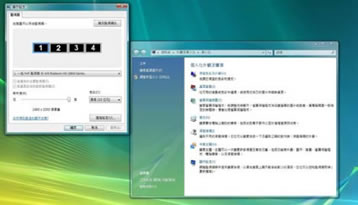
Setting up multiple monitors
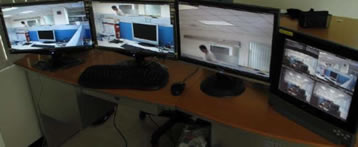
This section describes the setup of VAST Matrix for use with multiple monitors, using an installation with four monitors as an example.
- Prepare graphic cards with more than a single port.

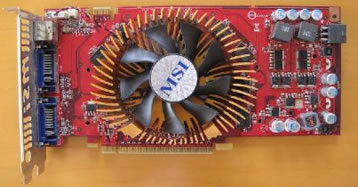

Note: To ensure compatibility, choose graphics cards from the same vendor as the system's graphics processor—for example, NVIDIA or ATI.
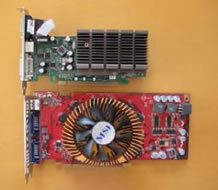
- The system motherboard must support multiple graphics cards.

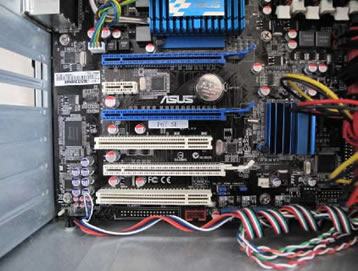
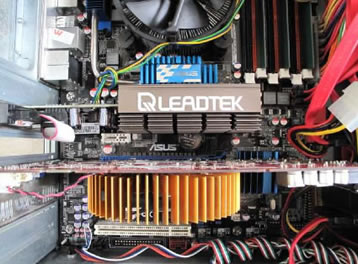
- Install the two graphics cards on the motherboard.

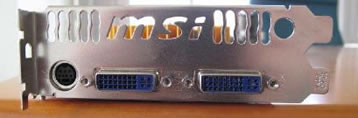
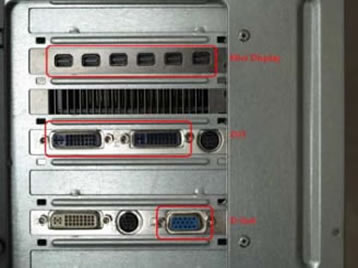
- Set up the monitors.


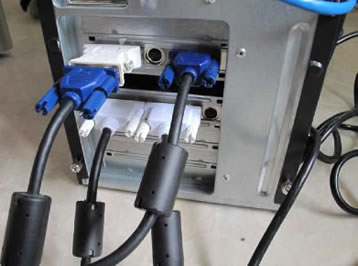
Note: Each graphic card has a specific type of connector. Some of the most common ones are Mini Display, DVI and D-Sub.
- Start up the computer system, and make sure all the graphics cards are detected. You can set the display order as desired.

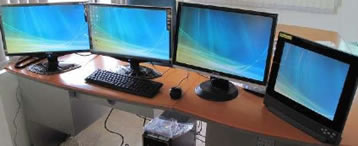

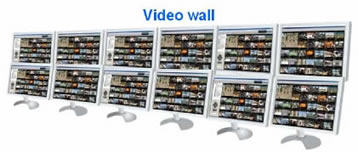
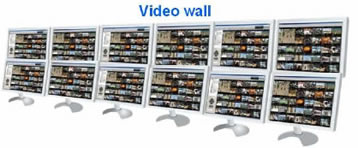
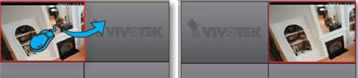
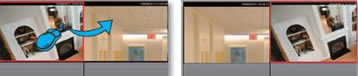
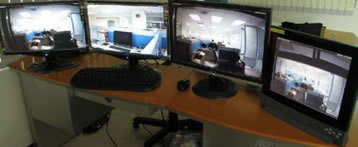
- After setting up multiple monitors for display using VAST Matrix, you can have a video wall like the one shown below.

Was this article helpful?
Bu bilgiler sorununuzu çözmeye yardımcı oldu mu?
Still need help?
Uzman ekibimiz size yardımcı olmak için burada.